Gold cometh gladly and in increasing quantity to any man who will put by not less than one-tenth of his earnings to create an estate for his future and that of his family.
I recently re-read “The Richest Man in Babylon” and these two quotes stood out most of all. They are also the beginning of how to get your financial life in order. The first means that it is your duty to keep one tenth of everything you earn. YOUR’s to keep, not to pay bills, not for spending on frivolous things, money to keep and save, before anything else is spent from your earnings. Dave Ramsey says to pay yourself first, this is what that means.
The second basically says the same thing, but gives the meaning a little more definition. Once you force yourself to do this, and continue for a few months, it becomes habit. The best part is, you won’t miss the money once you start saving it. It feels good to know you have some money put aside.
I highly recommend everyone read this book, it is only 72 pages long and was written in 1926. Every message holds true today. It is set in Babylon and has several stories of men passing on their knowledge and wisdom on how to gain wealth, regardless of your circumstances.
Advice is one of those things that is freely given, but not always taken. We cannot force people to take our advice, just as we cannot force them to do anything they do not want to do. Yet we continue to offer it. I remember during a youth exchange week, the younger members of our church took over positions in the church to give them an idea of what our other members did each week. It was a great learning experience. I was tasked to preach on Sunday morning. I sought counsel from the pastor on how to prepare for the sermon. He made some suggestions and showed me how to layout a sermon, but the one thing I remember about that meeting was a statement he made, “I can show you how to do this, and advise you til I am blue in the face, but you have to be willing to receive that advice and act on it. Just as we have to be willing to take Jesus into our hearts. The bible teaches that if you knock, you will be received, but you have to make the decision to knock.” I took that information and delivered a short sermon that Sunday.
How many of us have been given very good advice, yet failed to accept it? How do you think that affected the outcome of some of your trying times in life? How would it have been different, if you had taken the advice? Some very deep thoughts to ponder in the future. Advice is worth nothing if you are not willing to take it, yet people keep giving it. Maybe there is some value in there, if you are willing to figure out what it is.
“When the spider lilies bloom, there will be frost in 8 weeks.” ~Grandpa
I noticed our spider lilies beginning to bloom yesterday.
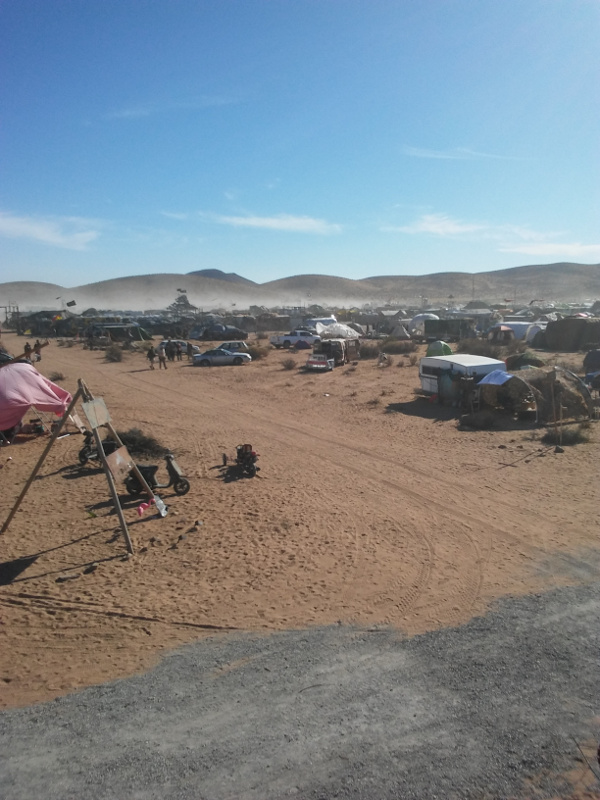
As the weather moves in from Gordon (tropical storm/hurricane), I reflect back to last year when I and several other friends were preparing for Wasteland Weekend in California City, California. The general rule was “More Dirt”. Everything had to look dirty, aged and old. As the rains comes in, I can’t help but think this is a perfect time to set up my shelter and my gear to make sure it can withstand the winds (although it was thoroughly tested in the desert last year), but more so to remove all the leftover dirt it collected from the desert last year. Naa, I think I’ll just leave it for my next trip. Won’t have to spend so much time putting dirt on it, it is already there.
I was thinking about the legacy I will leave behind once I depart this world. The little things are what I remember about people once they are gone, and it got me to thinking. What would people remember about me? I have decided to chronicle some of my tips and advice for life, things I hope I have taught my children and things I think people should know about or rather what I hope they learned from me living my everyday life.
Always be aware of your surroundings and what is happening around you.
People always want to know the reason I have to be able to see the entrance door when I sit down in a restaurant. The reason is, I always want to be aware of what is going on around me. If there is trouble, 90 percent of the time, you will see it coming because you can see everyone who enters and leaves. If your back is facing the door, you could be blind sided.
Many who have severed in the military are like this, it is something we were taught from the beginning of basic training. If you can see it, you can react to it. Even if the only action you take is to hit the deck. This is a skill many have never learned, or even considered. I want to know if someone with a weapon enters a space I am occupying.
I recently read an article about a young lady who pulled into a Taco Bell and sat in her car for a few minutes checking her phone. She happened to look up into her rear-view mirror and saw a man approaching her car. She kept her cool, and locked the doors. When the man reached the rear of the car, he paused and looked around, then started slowly moving to the passenger door. The driver glanced out the window and saw a gun. She put the car in reverse, started backing out and blowing the horn. The man disappeared. There were people in the parking lot less than 3 parking spaces from her, they never saw a thing.
I wonder the reason no one else noticed? They were too busy doing their own thing, be that looking at their phones, talking to the person next to them, or just plain lack of paying attention to what was going on around them. This happened within 25 miles of my location. There is bad in this world and many are oblivious to it.
Her are some tips to help you start paying better attention to your surroundings. Start by taking a few minutes to look around before you get into or out of your vehicle. Who is around, what type vehicle is next to you on each side? Never park next to a van with no windows, When approaching your vehicle, look to see if you can see shadows on the ground on the blind side of the car. You can see under your vehicle from a distance. If there is anything on the windshield, leave it until you are out of the immediate area. Be aware of what is going on around you. Look for quick avenues of escape, both on foot and in your vehicle.
Put your phone away when you are walking, it only takes a few seconds for someone to approach you and remove your ability to break contact. I could go on about possible scenarios, the key is to start paying attention. Consider what could happen and have a plan of action prepared before the fact. Don’t be a statistic, be prepared. We have all heard about the amount of time it takes law enforcement to get to the scene and the truth of the matter is, if you are not prepared to handle the situation yourself, it will be too late.
I am not saying to not call law enforcement, they should be called. Any incident where you feel threatened or in danger is time to call them, just know it may take them some time to get there. Once they arrive, will you be able to give them a detailed description of the person or vehicle? Many cannot. Start making yourself notice details of your surroundings, and ask yourself questions 5 or 10 minutes later. Next time you pull into a parking space, mentally note the color of each car next to you. Once you get inside the store, try to recall the colors. Once that task is easy, start noting the make of the vehicle, was it a Ford, a Chevy? Do the same with people you come in contact with through the day, what type and color clothing were they wearing, distinguishing marks? You get the idea. It could come in handy in the future. You might not be directly involved, but you could be witness to something that happened.
Start paying attention and know what is going on around you.
A gentleman by the name of Cannon asked me how I made my muscadine mead and wine. Yes, you read that right, someone else with the same name as me. I will explain how I make my mead. Many say I don’t make it the right way, but my way works for me. I have been making mead and wine for about 5 years now and everyone who tries it wants more of it. I am always trying new flavors, but I have my old faithful, muscadine mead and scuffadine wine are two of those. (muscadines are wild red grapes and scuffadines are wild white grapes). Continue reading “Mead Making Process – by Cannon Trawets”
Many people ask about designing props and models for costume pieces, props and other items we make. While not an artist in the form of drawing and sketching, I do have a background with mechanical drawing. I took a class in the eight grade and was interested in drawing schematics and architectual designs since. One of my first complex drawings was the Viper from Battlestar Galactica in the late 70s. Today I do most of my sketching on the computer with Google Sketchup. I have come a long way from the paper and pencil drawing on the mechanical desk.
Sketchup allows for a full sized drawing of the item I am designing and the ability to scale to the size I want to model. I won’t get into the specifics of the program, as there are plenty of tutorials on YouTube and on the google site as well. Another aspect of drawing in Sketchup is the ability to save files for 3D printers, something I plan to dabble with in the near future.
The first step is to get an idea of what you want to build. I was recently asked about building a model of an airship and what materials to use and how to get started. You need to have a basic visual image of what you want in your mind to put a design on “paper”. I have always wanted to build a model of our airship and started by looking at various images of ship types I might want to convert to the steampunk genre. At first, I was visualizing a tall ship, but soon decided I wanted something simple. I spoke with a friend who builds models professionally. After talking and hashing out details, we came up with a design that I liked. It was not exactly what I had invisioned, but was close enough to what I was after. I had a pencil sketch of the profiles that I could use to transfer to the software.
The next step is to deide on size and materials of the build. I used to build plastic models of planes, cars, ships, really anything I could find a kit for. Later I got interested in remote control aircraft and learned to build using balsa wood, tissue skins, and shrinkable mylar. This was handy as I continued to design the ship in my head. I questioned if I wanted a static model or one that could actually be flown remotely. I looked at both ideas and did some research on envelopes and using actual hot air to make the model lift properly. I am still researching and figuring the math to make this a possibility. It takes a great deal of envelope to lift even a small model with hot air. I watched a lot of videos on model ballooning on YouTube.
I plan you use balsa wood for the majority of the actual ship build when I get started, in order to keep the model light weight. I will also be using rip stop nylon for any envelope system I use. (Current plan in to use an enclose envelope). I also plan to use ducted fans from the model aircraft hobby as my propulsion system, as well as servos to be able to remote control the model. I can’t tell you when I will be done, because this will be a large scale model, and I can only dedicate so much time to it. If I were to change direction and go with a static model, I would still use balsa because it is so easy to use. It cuts easy, you can mold and bend it to a degree, and easy to sand.
When building, you should consider the weight of everything, especially if you are going to transport for display or make the model functional. I plan to use 3D printing for much of the rigging that can’t be done out of balsa, especially the parts that are representative of metal. The filament used in 3D printing is much lighter that actual metal, even if you used aluminum roof flashing.
If you are not sure about how something fits together, use Sketchup to draw it. You would be surprised by how much you learn about connecting different items with this tool. Make clay models to simulate what you want the finished part to look like. You can mold it until it fits just righ and looks pleasing to the eye, then use it for measurements to transfer to the material you will actually use. On that note, use a material that is comfortable for you to work with, or be prepared for a learning curve as you delve into new territory. Most importantly, have fun with it. If something doesn’t work, try something else, never give up. The most fun I have had in steampunk is learning new skills.
Props are very similar in the process of model building. Many times, it is just trial and error on the items you have available to you (test fit parts and see how they look together and keep adding until it is asthetically pleasing to your eye), unless you are going for something very specific. Make sure you use the correct adhesives for the items you are joining together. With balsa, a good wood glue or super glue works well. We have also found that E6000 works very well on a variety of items. Contact cement is also a good adhesive to learn to use properly. And be prepared to do a lot of sanding if you plan to paint your models or props. Especially plastics, they had a mold sizing residue left on them that is oil based, so good sanding and a good cleaning with mineral spirits is required for a good paint job. My recommendations for paint is always automotive paint, it is more durable and adhere much better to metals and plastics.
If you have specific questions, please comment here or send me an email at cannon@airship67.com. Make sure you are specific with the subject line in reference to your question.
Even steampunks have varied interests while docked in port. One of my interests is gardening. In my travels I was introduced to aquaponics, and wicking beds, in particular. I decided to work my way into the aquaponics realm by starting with stand alone wicking beds that could be incorporated into an aquaponics system as I was able to build it. I also wanted planting containers that were mobile. I started with 5 Gallon buckets from Home Depot. My design process is simple and easy to duplicate.
I started by drilling a hole in the bottom of the bucket with a paddle bit and an electric hand drill. Then I inserted a 3/4 inch bulkhead fitting into the hole. I got my fitting from Tractor Supply. I also discovered they were slow about reordering the fittings. The bulkhead fitting is reverse threaded so it doesn’t loosen up when adding the male adapters.
I used 3/4 inch PVC male adapters and hand tightened them into the bulkhead fitting. There is no need to use glue since there is no pressure on the fitting. Repairs are also much easier with no glue present.
I used the same fitting on the bottom. This will be used to join the planters together at a later time. For the time being, the fitting will ensure the threads in the bulkhead fitting are protected.
Next I cut the 4 inch diameter excluder pipe from 4 inch diameter PVC drain pipe, and the fill tube from 1 inch PVC water pipe. Both were cut 14 inches long and 1/4 inch holes drilled about 2 inches from the bottom. Keep the cuts as square as possible. On the 4 inch pipe, drill several holes around the perimeter of the pipe, on the 1 inch, you only need one hole.
I created a guide piece for different depths of the over flow tube. I can change the level of the water by changing this pipe out. The over flow tube is 3/4 inch PVC water pipe, cut to 14 inches long. In this case, I drilled the 3/8 inch hole for a 4 inch water depth.
I put all the pipe in the bucket. The over flow tube (3/4 inch) goes into the bulkhead adapter. The 4 inch excluder goes over the over flow tube to prevent the media from preventing changing this tube. The fill tube goes on the opposite side of the bucket. Eventually, this will allow the water to flow when added to the aquaponics system. Very important for oxygenation of the water.
My next step was to add lava rock to the bottom of the bucket. The rock really firms up the pipes and allows the water to rest in an aerobic state. The rock is also high in surface area and promotes lots of good bacteria that the plants can use. As you can see, I put water into the bucket at this point. The water gives you a very good reference point for how much rock to place in the bottom of the bucket. Add water until it begins to drain from the overflow tube. You want to keep the rock just below the surface of the water. You will not get this perfect, but make sure the weed block we add later will contact the water.
This is the lava rock I used. It was purchased at Home Depot for about $4 a bag. I used a little less than half a bag per bucket.
I cut a small piece of week block and made a hole that was tight around the 1 inch fill tube. I held the cloth over the end of the pipe and cut to the inside of the pipe to get a good fit. I placed this over the pipe and pushed it down until it rested on the rocks. (The picture of the 4 inch pipe will help you understand this better.)
I used the same technique to cut the 4 inch hole for the excluder. The weed block was cut a little bigger.
Placing weed block into the bucket at this point prevents the dirt from getting into the rock media and causing an anaerobic condition. This is not good for the plants. Standing water in the dirt can cause root root and several other issue for your plants. It is not pretty right now, but we will clean it up later. Make sure the block wraps around the pipes.
I mixed 2 types of material for my potting mix, then filled the bucket. I placed about 6 inches into the bucket and slightly pressed it down. You do not want to compact the soil. The material I am using is very hard to compact. I will show what I used below. Continue in small batches until the bucket is within a couple of inches from the top.
I used Organic Humus as one part of my mix.
The second half of my mix is garden soil. I mixed 50 – 50 of each. Both were bought from the garden center at Wal-Mart.
Once I had the planter in place, I planted Lemon Thyme in it, then watered from the top to make sure the soil was thoroughly damp and settled. From this point forward, water is added by using the fill tube.
This is German Basil I planted several months ago.
This is common Basil planted at the same time as the German Basil.
While you do have to monitor the water levels in these planters, the beauty of the system is the water wicks from the bottom and keeps the soil damp, creating the optimum moisture conditions to keep your plants hydrated. If you miss checking the water level for a day or two, your plants are still good, even in the heat of the deep south.
I was asked what plants did well in the deep south by a friend of mine in Louisiana. Below is a short list of what I have had luck with.
Zucchini, Pink eye peas, Green beans, all Peppers, Tomatill0s, Cherry tomatoes, Melons, Lemon balm, Herbs of all types, Micro greens (black oil sunflower grown for 7 to 10 days).
Plants I have had trouble with and the reasons for the trouble are:
Tomatoes – Bad problems with tomato horn worm eating the plants. I have been hand picking, but was recently suggested to use an organic spray that uses bacteria to control the worms. I am impressed with this spray Safer Brand 5163 Caterpillar Killer, it works and can be sprayed up until the time you pick the tomatoes. Since it is natural, it is safe for humans. Wash your tomatoes before eating or cooking with them. The other issue is full sun. While the plants were originally sub tropical, our harsh sun can scorch an dry them. They require plenty of water and I found that shade cloth with a 30% rating helps.
The other plant I have issues with are Crooked Neck Squash. You have to be careful watering them in the evening. The old timers say if they go to bed with wet feet, they will not produce. Vine borers are the other issue. You cannot see these bugs. The first indicator os the vines start to turn brown and dry out. If this occurs in your garden, pull them out and burn them. That is the best way I know to break the life cycle of this bug.
And make sure you mulch everything to help prevent moisture evaporation and weeds in your garden. I use wood chips and pine straw where I can.
The old saying, “You get what you pay for.” holds true for garden hoses. I bought the cheap hoses in my younger years and ended up buying a new one every year. The cheap hoses kink, crack, leak, and just fail.
I decided to spend more money on a hose after working with a nursery for a summer. We used large rubber hoses that were designed for commercial, industrial use. As a result of my experience with the higher quality hoses, I went out and bought several of these. I have three 100 foot and a 50 foot at my house, and another 50 foot hose on my property.
My hoses stay outside in the Mississippi heat, and often laying on the ground. They never kink, have only leaked when the little rubber washer fails, which is an east fix, and pull like a dream. The hose on my property has been laying on the ground for 4 years, in the sun and weather and still performs like the day I bought it.
The savings not having to replace a cheap hose every year is great. Two cheap hoses more than pay for this one, and this hose lasts for years. Do yourself a favor and quit fighting your garden hose. Life is much easier with this hose.
Happy watering,
Cannon
p.s. I thought I would change things up to keep the attention of my readers. I think I will feature a household, usable by everyone item on Fridays, something you will need on most weekends.
One of the first tools I got was a mallet/hammer. I was warned early on to never strike your tools with a metal hammer, never EVER, EVER. I started with a wooden mallet like this one (Basic Wooden Hammer) I was warned about the head coming loose, so I ripped the head off the handle, removed the staple holding the parts together and used a good wood glue (Elmers Wood Glue) to glue the head back on the handle. I then drilled a 1/4 inch hole through the side of the head and through the handle, and glued a 1/4 inch dowel rod (Dowel Rods) in the hole. It strengthens the tool and you would have to work hard to break it.
As I progressed, I moved to better hammers. Here are a couple I recommend, (Raw Hide Hammer), (Nylon Mallet), and a (Nylon Hammer). Any of these will work for tooling leather, it just depends on what you want to spend.
The nylon hammers/mallets do require a little maintenance every now and then. The nut on the end can come loose over time. A good solution to that issue is to apply some thread lock on the threads and tighten the nut down. (Loctite Blue Thread Lock).
I hope some of this information helps. I will continue to point everyone in the right direction on good tools to use. I will also try to point toward the least expensive, quality products to help you get started.
One way to help me continue to bring these items to you is to click the link and buy what you want. As an Amazon Associate I earn from qualifying purchases.. And the great part is, it does not cost you anything extra to throw a little support in my direction.
As I progress through a basic tool list, I will start providing some video content of small projects to let you see exactly how to turn leather into art. Stay tuned in and check back often.
Cutting leather requires a good knife. There are knives made specifically for cutting leather, but for a beginner, they can get expensive. When I first started out, I used a utility knife that I could change the blade in regularly. A good clean cut with a sharp blade makes working with leather a lot more enjoyable.
The utility knife is a multi use tool, it comes in handy in so many situations. I can use this to cut leather, cut sheet rock, open boxes, a variety of things. The knife is also comfortable as an every day carry blade. The price is very reasonable, so if you lose it, it doesn’t cost an arm and a leg to replace it. I have a few really expensive knives that I would be sick if I lost them.
I was first introduced to the Stanley brand while doing construction so many years ago. Everyone had a Stanley tool of some type. I used a straight, fixed utility knife for many years when I hung sheet rock, and it performed every day without fail.
If you are looking for a knife to cut leather, or just a utility knife in general, check out this Stanley. I will also link to extra blades.
I realized many people are not able to pay for classes to learn how to work with leather. I was provided information without charge, in an effort to keep a dying art alive and well. So I decided to pay it forward. Each purchase you make by clicking on the links pays me a small affiliate fee. As an Amazon Associate I earn from qualifying purchases. You get what you need to get started and I get a little compensation for my time to pass the information on. Both parties win, it’s like having your cake and eating it too. So please show some love and give a little support for my investment of passing this information on.
Remeber to practice safety in everything you do.
Cannon